How to reinstall Windows 7 Ultimate without a disk. A quick way to install Windows without a disk or flash drive. What to do after installing the system
If you still think that installation operating system- this is an activity for computer wizards, then you are seriously mistaken.
Using this guide, you can install Windows 7, even if you are a novice PC user. So, let's get ready first.
- Open "My computer" and look at which section you have in this moment system installed.
Remember its size and name so that you can find the volume you need during installation. - Collect in advance on a flash drive or other disk all the necessary drivers for your computer or laptop. If there is no disk with drivers, they can be downloaded from the official website of the equipment manufacturer. If you don’t do this, you risk being left without the Internet after installing the new system.
- Which windows bit depth 7 choose - ? Click « Control Panel -> System and Security -> System»
If your computer or laptop has more than 3 gigabytes installed random access memory, it’s definitely worth installing the 64-bit version. In general, we recommend installing x86 only on weak or very outdated hardware in the 21st century, after all :). Please note that the drivers for the same device are different; in fact, these are two different systems! - Download the installation ISO Windows image 7:
What are these images?
These are original MSDN images downloaded from the official Microsoft website. The only change is that the ability to select the system edition during installation is unlocked. No files are affected and the system is not activated.
Other versions of Windows 7 images can be downloaded. - Prepare a bootable USB flash drive with Windows 7. this manual We will install the system from a flash drive, because it is faster and easier. Similar instructions on how to create it can be found.
- Since during installation we will format the disk with installed system, then all important files stored on it must first be copied to removable media or to another partition of the hard drive. Remember that files located on the desktop are also stored on the system disk. If you need them, be sure to move them to another place. When formatting, all previously installed programs will be deleted, but this does not mean that they also need to be copied to flash drives and disks. It's easier to reinstall programs, so only worry about – photographs, documents, music, etc.
Create a bootable USB flash drive using . Next, insert it into the USB port and change to BIOS-e maternal boards boot priority so that this flash drive is loaded first. If you have any difficulties at this step, here detailed instructions. If you did everything correctly by changing the boot priority, then after exiting the BIOS and restarting the computer, the message “Press any key” will appear on the screen. Fulfill this requirement - press any key to start booting from the installation media.
You only need to press the key ONCE and only at this stage of installation.
After pressing any key, a message will appear indicating that Windows is downloading files.
System installation
So, let's proceed directly to installing Windows 7. Wait until their extraction is completed, after which the installer start window will appear on the screen. Congratulations, the hardest part is over!
- Select your language, time format and layout. Click "Further".
- Click on the big button "Install" to launch the installation wizard.
- Read the license terms and accept them.
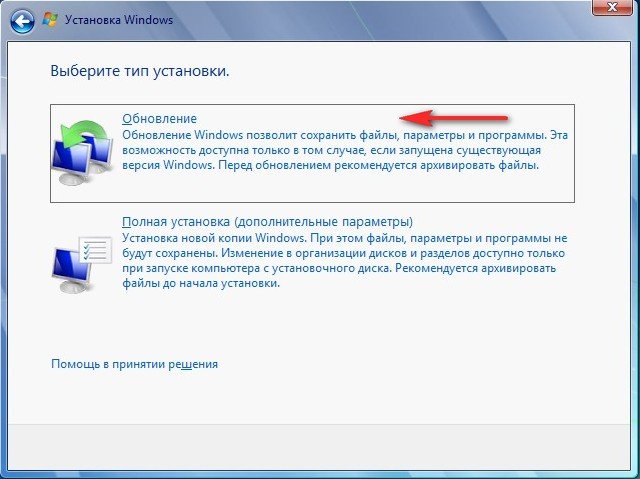
- Select full installation(update is not suitable for us).
- After starting the full installation, the partition selection screen appears. The installer window will have several sections: First usually reserved by the system (recovery files are stored in it). It weighs 100 MB and does not need to be touched. Second is a system file - that is, Windows files are stored on it. A new system is being installed on it. Third section – file. User data is stored here and remains untouched even after re Windows installations.
There may be other options: for example, there is no system-reserved partition or there is no volume with user files. In any case, you need the partition on which the previous system was already installed - it’s not for nothing that when preparing for installation, we advised you to look and remember its size.
If for some reason you still have one partition, the volume of which exceeds 250 GB, then it is better to immediately divide the disk into two volumes: one for Windows and programs (approximately 50-100 GB), the second for personal files. To do this, using the “Disk Setup” tool, delete the existing partition and first create the first volume (“Create” - specify the volume - “Apply”), and then the second.The created volumes must be named “Partition 1”, “Section 2”. There should be no unallocated space left - the system simply will not see it.
So, you have at least two partitions, one of which is dedicated to operating system files. If it has not just been created, but has already been created before, then it needs to be formatted by deleting all data. Click on the link "Disk Setup", highlight a section and press "Format". When formatting, all files from the system partition will be deleted (that is, the values in the columns " Full size” and “Free” will become the same). This is exactly what we wanted. To start a clean installation, click "Further", checking again that the partition you allocated for the system is highlighted.
- We wait. After selecting a partition and starting the installation, a window will appear on the screen in which you can see the process of unpacking Windows 7 files and writing them to the hard drive. While you can rest, you won’t have to do anything for 15-25 minutes. During this installation time, the computer will reboot several times. After the installation is complete, you need to specify some system operating parameters.
- Enter computer name Computer name The computer name is what your computer will be called on the local network. and username. It is advisable to use Latin characters instead of Russian, this will help avoid problems with some programs in the future.
- You can set an administrator password if you wish, but this is not necessary. If you set a password, you will need to enter it every time you start your computer or laptop. We will leave the field empty for now; you can “password” your account later.
- Enter your activation key if you have one. If there is no key, uncheck "Automatically activate" and skip the step by pressing "Further".
- Specify Windows settings– it’s better to choose the recommended parameters when you know better new system, configure it in your own way. After selecting all the necessary parameters, a working Windows table 7. You can begin your acquaintance with the system, but first reboot the computer and go into the BIOS again - here you need to change the boot priority back, putting the hard drive in first place.
- Turn on automatic update system and wait for the process to complete. Security updates will install most drivers. If there is no Internet, you can use a program to install drivers .
Attention!
Note: choose one Windows version, from which you have an activation key (you will enter it on final stage installations). If there is no key, read the instructions after installation.
The instructions turned out to be quite impressive in volume, but now you know the main nuances when installing Windows 7 and can easily do it yourself. Carefully follow the above recommendations and the installation will definitely be successful.
To install Windows 7 on computers that do not support a disk drive (for example, netbooks), you can use a flash drive, the volume of which must exceed 4 GB to completely accommodate all the distribution files necessary for correct installation and subsequent operation of the system.
Before installing Windows 7, you will need to download an operating system image. This can be done both on the official Microsoft mirror and on third-party resources. After downloading the image, you will need to install a program that will allow you to format the flash drive in required format and record all files in the image. Among the most convenient programs For Windows entries 7 can be noted Windows 7 USB/DVD Download Tool. The program is available on the official Microsoft website and allows you to write a licensed image to removable media.
Flash drive recording
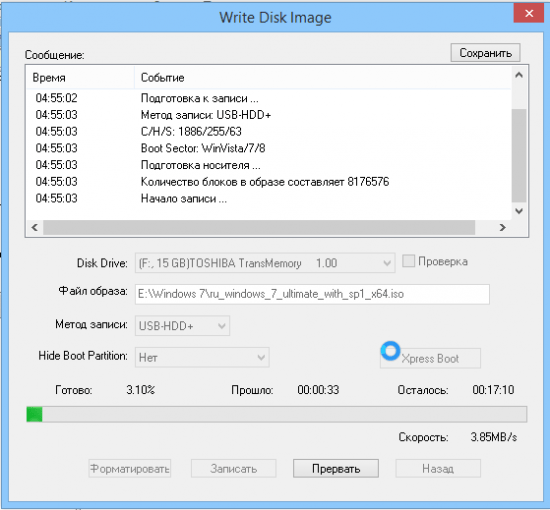
Insert the USB flash drive into the device and run Windows 7 USB/DVD Download Tool. A simple program interface will appear in front of you, through which the already downloaded image is recorded. Click on the “Browse” button and specify the path to ISO file the system image you downloaded earlier. Once selected, click "Open".
After specifying the path to the image, click on the Next button to proceed to writing the image to removable media. In the next menu, select USB Device. In the list provided, select the name of your flash drive, and then click Begin copying. Next, click Erase USB Device, and then confirm the information. After this, recording the image to the USB flash drive will begin, the process of which you can monitor in the main program window. Once the record status line is 100% full, you will see the Backup Completed message. The image recording is complete and you can begin installing the system.
Actions after recording
Before reinstalling the system, save all important files on separate media, as documents may be deleted during the installation process. After that go to Computer BIOS by pressing the Start Setup key (F2 or F4) when the computer boots. Go to the Boot section and select as First Boot Device the name of your flash drive. Save your changes and restart your computer. If the image was recorded correctly and BIOS settings were specified correctly, installation and initial configuration of the operating system will begin.
The best way to get rid of viruses and constant crashes in the operating system is to install a new OS. Most often, installation occurs by creating bootable flash drive or using a disk with a new system, but there are several quick ways that will help you install a new copy of Windows without using third-party digital media.
The following OS replacement options will suit users personal computer, which:
- The drive is broken, damaged or missing.
- No DVD.
- It is not possible to use Flash media.
- Absent external HDD disk.
Installing Windows via Hard Drive and computer command line
Hard drive is a hard drive (HDD) of a personal computer or laptop, which is designed to store user files and programs. Using the hard drive, you can install a new operating system.
Installation of a new OS occurs through command line when turning on the computer. This option of replacing the OS will allow you to clear all old disk partitions and create new ones. In order to begin the process of replacing the operating system, you need to download an iso image of the desired version of Windows. This can be done on the official Microsoft website or through a torrent client. The image will be downloaded to your computer in archive format; it needs to be unpacked to drive C. Then follow these instructions:
- While starting the computer, hold down the F8, Space or ESC button (depending on your computer model). After a few seconds, a custom menu of additional OS boot options should appear on the screen.
- The next step is to select “Troubleshooting”. The selection is made by pressing the Enter key.

- Next, a system recovery options window will appear. In it you need to select input via the keyboard.
- Select a computer user from the list and enter a password, if one was set when logging in.
- From the proposed installation options, you need to select “Command Line”.
- After opening the command line window, you should type several commands. Input is via the keyboard. You can print a new command by pressing Enter. Navigate to the drive that contains installation file system using the following command: “X:windowssystem32C:” (without parentheses). Press Enter (If the installation file is not on drive C, replace the letter in the command with the desired one).
- Enter the following command: ">setup.exe" (without parentheses).
- In a few seconds, the installation of the new OS will begin, which is no different from installing using a disk or flash drive.
This method is suitable for operating systems Windows 7, Win 8/8.1, Windows 10.
Note: Please note that the installed and downloaded OS must have the same bit depth (32 or 64 bits).
Using the installation image and virtual drive
The easiest way to install Windows is to download a system image from the Internet. The process of downloading the image archive is exactly the same as in the previous section of the article, however, you do not need to unpack it. The disk image allows without using disk drive install any program, game, utility or operating system.

Users of OS Windows XP/7 must install additional software to work with images. In newer Windows versions You can work with images without using additional software (such files are recognized as archives; to install the image, you need to open it with an archiver and run the installation file).
Some tips for downloading an OS image:
- Do not download files from suspicious sites and resources.
- Refrain from choosing various modified OS builds. They almost always contain a lot of viruses and spyware that can steal your personal information, passwords or credit card numbers.
- Choose only trusted resources (Microsoft websites or specialized utilities for installing a new OS).
In the imaging utility, create a virtual disk with the new OS (read more about the most popular and reliable programs for creating virtual disk drives in the next section of this article). In order to create new disk, select the desired iso image in the program. Next, the program will provide everything necessary instructions. The disc creation process will take less than a minute. Next, double-click on the created disk, thus launching the OS installation window.
Programs for quickly creating a virtual drive
If you are using OS Windows XP/7, then you should select a program to work with virtual optical drives. The list below shows the most popular programs and their features:

- Daemon Tools. One of the very first and most popular programs on the market of this kind software. Conditional program free for users Lite and Premium versions. Working with existing virtual disks is organized in a very convenient way; the user can quickly create and delete disks. IN free version Software, it is possible to create only 4 images at a time. The program supports iso, img, dmg, vdf, mds, mdf formats.
- The program is distinguished by its ability to create a large number of virtual disks simultaneously. There is also the ability to record to a removable CD. With this program, users will be able to store all their disks virtually in case physical disk will be damaged. It is also possible to download images from the Internet and mount them for further installation using this program.
- Software that works exclusively with ISO images. Images are mounted quickly and execution time is kept to a minimum. It is possible to convert images of other formats directly to ISO.
- The utility is free and available for download. Function available self-creation disk images.
- Virtual CloneDrive. A program with a minimum of settings, high speed execution and reading of disks. The OS recognizes the created disk as a physical CD/DVD-ROM.
Free OS updates
Microsoft regularly provides users with licensed versions of the OS the opportunity to free update to newer software versions. Windows users 7 Home Edition can upgrade to the Professional or Premium version through the official Microsoft.com website or through the update center, which is located in the control panel of each computer. Installing new software is as easy as pressing a few buttons. Basically, installing a new system takes from half an hour to 120 minutes, depending on the speed of operation central processor computer or laptop.
It is possible to replace Windows 7 with Windows 88.1 for free. Follow the instructions to find out about the possibility of updating the OS:
- Download the Update Assistant from Microsoft here
- Run it and wait for the installation to complete. This will take a few minutes.
- Follow the on-screen instructions to learn which new version The OS is compatible with your system. Next, the program will offer to download new software and install it.
If you switched to this page, then you have decided to reinstall Windows 7 and you need help with the installation. Below I will tell you in detail all the stages, starting with Windows boot on your computer and ending with Windows Activation and a short introductory video. And so let's get started. The first thing you need to do is download the Windows 7 image itself; there are two types: 32x and 64x. How to understand what bit depth you need, very simply in the computer properties there is information about your hardware, we are interested in the RAM line ( installed memory). If you have 4 GB or more installed, you need a 64-bit version, everything below is 32-bit.
When we have already decided on the bit depth, we proceed to download the Windows 7 image. Click on the green button “Download Windows 7 Ultimate” and a torrent file called ru_windows_7_ultimate_with_sp1_x86.iso.torrent will be downloaded to your computer. We launch it to proceed to downloading via torrent program. If the file asks you to open it through any program, then uTorrent is not installed. follow the link to download it.
While Windows is in the process of downloading, we will download and install UltraISO program. Using it, we will write the image to a disk or flash drive.

After installing UltraISO and loading Windows, let's start recording to a disk or flash drive. Launch UltraISO and perform the actions as in the screenshot:

Open the image with the program and perform recording.


We wait for the process to complete and close the program window. Now your flash drive or disk is ready to start outside the system.
Well, now the most interesting thing is, we need to tell the computer to start from our media; for this we need to call the BOOT MENU. Usually these are the DEL or F8 keys, but there are exceptions, it all depends on the manufacturer of your motherboard– below are the buttons from which you can call the BUTMENU from various motherboards.

If you did everything correctly, you will see a type of menu with a boot selection, control using the arrows and the ENTER key.

After selecting the BOOTMENU, it will begin copying the “loading in Windows file” files to start installing Windows 7. In the first installation window, you must select a language and click Next.

In the next window, click Install.

Selecting the installation type, click “Full installation (advanced options)

And here is the most important window, selecting the partition on which the installation will be performed. For correct installation you must format the system C drive where your old Windows is located. Ideally, it is better to delete it and also the partition where the MBR is stored; it usually weighs 100 MB. To do this, select the section and click Delete. “Unallocated disk space” will appear. Click “Create”, specify the disk size or leave it unchanged and click “Apply”

Now it’s a matter of time, as soon as you click Next, copying files to install Windows 7 will begin. You can remove the flash drive or disk after the first reboot and watch the installation process until the Select user name window appears. Enter any desired name and click Next.

In the Windows product key entry window, uncheck the “Automatically activate Windows when you connect to the Internet” checkbox and click Next.

That’s the whole simple installation process, a familiar desktop will appear in front of you - which means that Windows 7 Ultimate is installed.
Another important and mandatory process is Windows activation. On the desktop, find a shortcut called “Activator”, launch it and do everything as shown below in the screenshots.
Friends, many letters come with the question of how to properly reinstall or update the Windows 7 operating system and what exactly is the difference between these two concepts.
Letter No. 1. Please bring clarity to a question that is confusing for many, than reinstalling Windows 7 different from the update and which is better to prefer? The operating system 7 I have installed behaves extremely unstable, it takes a long time to load, many programs have stopped installing, sometimes errors like this appear, for example, some system file or dynamic library is missing. Rolling back a significant period of time using a restore point did not help. I don’t want to reinstall again, since I have a lot of programs installed. You said in your comment that restoration needs to be done system files, put things in order in startup, run Windows optimization 7 or, as a last resort, update or reinstall Windows 7; unfortunately, I haven’t heard anything about the latter.
I would like to know, firstly:
How to actually carry out this update or reinstallation of the operating system and what will happen to my personal files on the system partition, will they be lost?
Secondly: they say that the update is launched only from a running operating system. Is it so? After all, it was possible to run an update in XP even when the system did not boot at all. Thanks in advance, Pavel.
Reinstalling Windows 7
To make everything clear to you, I will walk you through the process of updating your operating system, and then I will show you how to reinstall Windows 7 in two ways and you will see everything with your own eyes, but first I will still explain to you what an Update is and Reinstalling Windows 7.

What is a Windows 7 update?
This is installing a system on top of the old one, that is, you insert a disk with the Windows 7 distribution and start installing the system directly in the running 7, but in the installation menu you select not a full installation, but an update. What does it give?
First of all, damaged system files will be replaced; working system files will not be replaced, including your personal data: installed applications, documents, music, nothing will happen, all your programs will run and your entire household on all disks will remain untouched. Also Accounts users will be transferred without changes, all this will be done by the tool - Transfer Tool Windows data(very important files, it’s still better to transfer them manually). I also want to say that you will have to re-enter the product key, select the language, region, set the time, and so on. Warning. If you have an unlicensed Windows 7, then after the update you will have a window in the lower right corner of your desktop warning that your copy of Windows is not genuine.
- They also often ask how the Data Transfer Tool works? At Windows update 7, temporary folders of your data will be created containing information about user accounts and settings, your Email, files in the “Favorites” folder, personal files and user folders – music, images, videos, as well as settings installed programs. Once your system is updated, all data will return to its place, and temporary folders will be deleted. When upgrading, the data transfer tool does not allow the user to select files to transfer, but when reinstalling, you can select what you want to transfer (details below).
Will the update solve all your problems related to Windows operation 7? In most cases, Yes, but unfortunately no one can guarantee a 100% result here. In my opinion, if possible, it is better to delete and reformat the partition with a poorly functioning operating system, having first transferred all important files to other hard drive volumes or a portable USB drive and reinstall the system with all programs.
- Note: Windows XP has the same update mechanism and it can be launched both in a running operating system, and in cases where you cannot log into Windows XP due to problems, then you can boot from the XP installation disk and select setup menu option, . Please be aware that in Windows 7, unfortunately, there is no such option and the update can only be carried out in a running operating system.
What is reinstalling Windows 7?
Reinstallation is a complete replacement of all operating system files, that is, formatting a partition with an unstable system and installing Windows 7 again. Naturally, all your files and the system itself will be deleted from the drive (C:). In order to transfer all your files from system disk(C:), you will need to use Windows Easy Transfer, but it will no longer work automatically, as in the case of an update, but we will use it ourselves and what we need to transfer from old system to the new one, we’ll also choose it ourselves.
- Now this begs the question: What is the difference between reinstalling the system and installing it again? Friends are just here. When reinstalling Windows 7, you can use File Transfer Tool if you wish, since you already had the system installed once, but when simply installing the system again, install the system on the new partition you created hard drive. In short, here it is, I don’t know how to explain it more clearly!
What can I say, let's first update my Windows 7 together, and at the end of the article we will reinstall the system using the file transfer tool, it has also been working with errors for me lately and you will see with your own eyes, and then select what you need.
Windows 7 update
We insert installation disk from Windows 7 to the drive, if you do not have autorun, click setup.exe.

Before updating, we can connect to the Internet and download Latest updates from the official Microsoft website

Select Update
Compatibility check

Copy Windows files

Collecting files, settings, and programs, Unpacking Windows files, Installing features and updates, Transferring settings and program files


The computer restarts.
In this place you need to boot from the hard drive, and not a bootable USB flash drive or boot disk with Win 7.
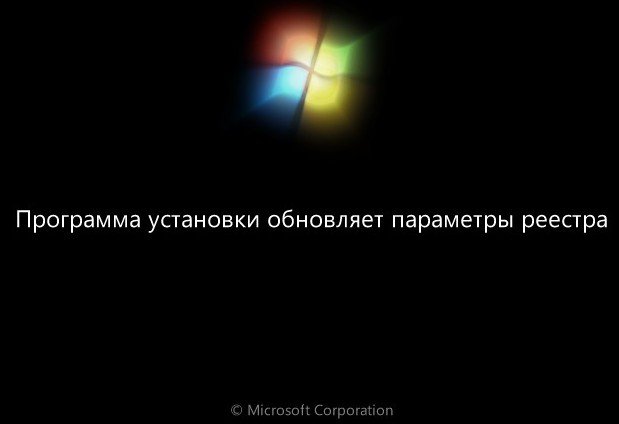
Updating Registry Settings
Enter the key


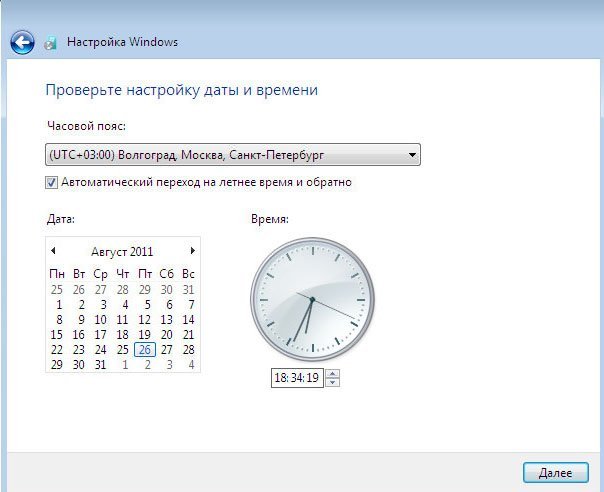
Setting the time
The update process is completed, the accounts are saved

All my files are in place, all programs run.
Reinstalling Windows 7
Now let's find out what Reinstalling Windows 7 is. According to the rules, we will reinstall Windows 7 on the same disk on which the old operating system is installed. If before Windows was installed, for example, on the partition (C:), then you need to reinstall it also on the partition (C:) and NOT on any other partition (otherwise this will be the installation of a second operating system). All your files on the partition (C:) will be replaced with files from the newly installed operating system Windows systems 7.
- First of all, we will launch the Data Transfer Tool, which will copy all our personal data from Windows partition 7 to portable media or another partition of the hard drive, then boot from the installation Windows disk 7 (how to set it to ) and install the system again. Immediately after installing Windows 7, let's launch Data Transfer Tool and copy all our files back, as a result we will get a new operating system and all our data: music, documents, personal folders, and so on.
- Note: You may ask: Is it possible to start installing a new system directly from a running Windows 7 and not go into the BIOS. Answer: This method is given at the end and we will also consider it.
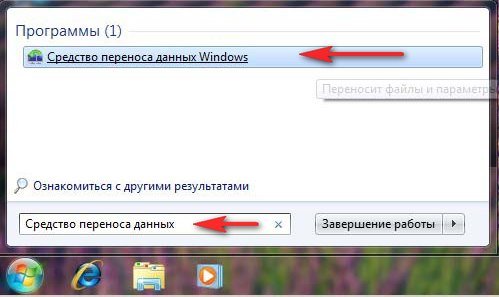
Let's now see what the Data Transfer Tool will transfer from our files, let's launch it.
Start, write in the input field Data Transfer Tool
In this window we see detailed information We will now choose which files we can transfer from the old operating system to the new one.

The data transfer tool suggests us to use:
- Data transfer cable - a cable specially designed for this purpose, which still needs to be purchased, is used to transfer files between two computers; in principle, we do not need this, because we have one computer.
- Network – transferring files over the network is also not our option.
- External drive or USB flash memory device. What we need. If you don't have much data, you can even use an 8GB or 16GB flash drive. By the way, if you don’t have a flash drive or portable USB drive, you can use another partition of your hard drive for storage, like I did for example.
So you selected an External drive or USB flash memory device, and I selected a partition on the hard drive (D:).

We select This is my source computer, that is, the data needs to be transferred from it.

Data that can be transferred to the new system is analyzed at Usernames and General elements, click Settings, and also if you click Advanced, a full picture of what the Data Transfer Tool will include in the archive will open.

Please note that the archive includes the folders of both operating system users and personal data, this is correct. But we definitely don’t need to transfer data located on all partitions of the hard drive except the system one (C:), since you and I will be reinstalling Windows 7 located on (C:) and the reinstallation process in our case will only affect system partition(WITH:). Uncheck all hard drives.


However, if you decide to transfer data from all partitions, you can leave the checkbox unchecked, just keep in mind that the data transfer file in this case will occupy a very large volume..
What else should not be included in the archive that the data migration tool will create? For example, you may not include the C:\Program Files folder; it would be safer to install all programs again after reinstalling Windows 7.
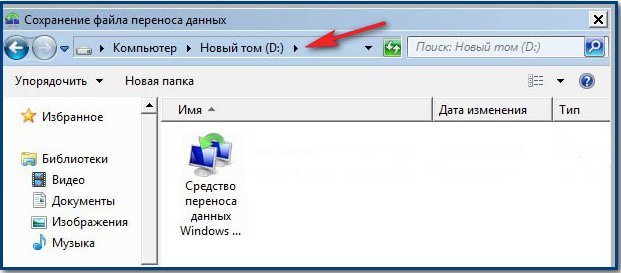
So click Save, you can assign a password


The file transfer process is in progress. A transfer file with the extension (MIG) is created on disk (D:)

Now it’s the turn to reinstall Windows 7, insert the installation disk with the seven into the drive and reboot, at the beginning of the installation it is better to click on the Disk Setup button and select Format partition with previous Windows 7, and in general the whole process step by step, starting from changing priority boot device in the BIOS and before installing the operating system itself, is described in our article.
I think you’ve done it and installed the system, now let’s use our Data Transfer Tool again.

Let's choose It's mine new computer(requires transferring files and settings to this computer)

Your external HDD with the data transfer file must already be connected.
I, in turn, indicate the hard drive partition (D:), the transfer file is located there.


We can click Settings and select files to transfer to the new system manually, as we have already done, or simply click Transfer.


