How to create a virtual wi-fi. Creation of a computer network. Deleting an access point
![]() Imagine this situation: you have a laptop or computer running Windows 10 at home with Internet access (via cable or USB modem), and in addition, you have a tablet, smartphone, TV, etc., which would also be nice connect to the Internet, of course, if you have a Wi-Fi router, it would not be difficult, but what to do when there are a lot of devices, there is no router, and everyone wants to use the Internet.
Imagine this situation: you have a laptop or computer running Windows 10 at home with Internet access (via cable or USB modem), and in addition, you have a tablet, smartphone, TV, etc., which would also be nice connect to the Internet, of course, if you have a Wi-Fi router, it would not be difficult, but what to do when there are a lot of devices, there is no router, and everyone wants to use the Internet.
There is a way out, you can configure the distribution of the Internet via Wi-Fi directly from a laptop or from a stationary PC (provided that it has a discrete or external Wi-Fi adapter), i.e. create a virtual access point (Hot Spot), essentially turning your computer into a Wi-Fi router.
All this, of course, can be implemented using standard Windows tools (), but for most people it will not be so easy to figure out all the intricacies of such a setting, therefore, to distribute the Internet via Wi-Fi, it would be much more convenient to use the free Switch Virtual Router program, which will help it is easy for every PC user to create and run a virtual hotspot.
Program settings
- Download the program from a direct link;
- Installation is not required, just extract the files from the archive (for example, using an archiver or);
- Run VirtualRouterPlus.exe;
- Fill in the Network Name (SSID) field - you can come up with any name, in our example “alpinefile”;
- Password - set a password, a combination of letters (Latin) and numbers, but, of course, it is better not to enter such a password as ours "12345678", come up with something more complicated;


- The program is up and running, but that's not all;


- In the left part of the window, click "Change adapter settings";

- In the window that opens, select the main wireless connection, right-click on it, then "Properties";
- Open the "Access" tab, check the box next to the item: "Allow other network users to use this computer's connection", then in "Home network connection" select "Local Area Connection * 3" (created by the Virtual Router Plus program, your name may differ ). The order of the above actions is shown in the screenshot;

- That's all, now we can distribute the Internet via Wi-Fi and without a router.
Possible setup problems
If you did everything according to the instructions, the program works correctly, as evidenced by such an icon in the notification area,
but there is no connection, then, with a high degree of probability, it can be argued that the connection is blocked by the firewall installed in the system of the anti-virus program (Dr.Web, for example, does just that). Therefore, do not forget, if necessary, to add the created Internet connection to the exclusions of your antivirus software.
A simple and convenient program for distributing the Internet via Wi-Fi of a computer or laptop. Those. the program will help you create a virtual access point from your device's Wi-Fi adapter and allow you to connect to it from your phone, tablet or TV. Naturally, the Internet to your PC or laptop should come via a different network connection, from where it will be distributed. The program is absolutely free and has support for the Russian language.
Setting up the program does not raise any special questions, but if you could not figure it out, then see the instructions below, which show all the details of setting up the program for distributing Wi-Fi from a computer. I will try to describe the setting in the most understandable language even for the most novice users.
1. First you need to make sure that the Wi-Fi adapter is working correctly. In the device manager, check for the presence of drivers for the device. Picture below.
2. Download the Switch Virtual Router program from the link below or from the official website.
3. Install the program and run it. In the settings on the right, specify Russian Interface language.
 On the left, we write an arbitrary name for your virtual network and an arbitrary password (at least 8 characters).
 Click Apply and OK. The main window of the program is shown. At the top right, click the arrow and an additional setting appears. Here, in the drop-down list, select the wireless connection and click OK. With the same button, we collapse this menu.
 4. Then you can press start and your WiFi router will work, but there will be no Internet in it. This can be seen by clicking on the "network indicator" in the system tray. In the window that appears, we see that our virtual network does not have access to the Internet.
 5. Go to Network and Sharing Center by clicking on the label at the bottom.
 We see that the Internet comes to me through a cable connection with the name DIR-632. And our virtual network SVR site has connection name - . (Your name may be different, it doesn't matter). Just remember it and click on the inscription " LAN connection on the connection through which the Internet comes to the computer. The window below appears.
 Click on the button Properties and a new network settings window appears.
 Next, click on the tab Access(top of the window). In this tab, put a tick in the menu "Allow other network users to use this computer's Internet connection." Below we select the name of our wireless connection, we had it and Wireless network connection 4 press OK.
 After that, if you click again in the tray on the “network connections icon”, we will see that our network already has access to the Internet.
 Now we again need to restart our virtual router in order for the Internet to appear in it. After that, you can connect from it through any smart, tablet, laptop, TV and use this Internet.
If you have any questions, be sure to write about them in the comments, they will deal with them.
Virtual router manager is designed to help if you do not have a real wi-fi router, but you need to distribute it. Its main task is to imitate a wi-fi router, so you can forget about any wires and inconveniences. The program is reliable and licensed, there are no viruses in it, and you can download virtual router manager for free. The program is compatible with the operating system Microsoft Windows XP, Seven and above.
What devices is the program compatible with?
The key condition for the correct operation of the program is the presence of wi-fi on the distributing and receiving devices. The receiving devices can be: iPhone, iPod Touch, netbooks, laptops, audio devices, wireless all-in-ones, smartphones, Android or Zune phones, and others. The distributing device (usually a computer) on which the program is installed must have a wi-fi adapter.Where to download Virtual Router?
You can download virtual router manager on the official website or on torrents. Please note that the file must only be with the extension ".exe" or ".msi". Anyone can set up the program without even reading the instructions. Using the program is even easier than installing it.How to get started with virtual router manager?
To distribute wifi on windows, you will need to perform the simplest manipulations:- correctly indicate the name of your network;
- enter a password;
- press the "Start" button.
Entering a password is necessary for the security of the transmitted data so that another person cannot unauthorizedly connect to your virtual distribution. All devices that you connect via virtual wifi will be displayed in the program window. If necessary, it is even possible to find out the ip and MAC addresses of each device by looking at them in the program window.
Working with the program
At its core, the Russian version of the virtual router manager is a shell, that is, it is able to perform all the settings for you. To get access via wifi, just run the program and minimize it to tray after it. With such actions, every time you turn on the computer, it will automatically start.
Program settings
The setting comes down to filling or selecting in 4 lines:- to create a wifi network, you need to come up with any name for it in the top field;
- in the next field, come up with a password consisting of at least 8 characters;
- in the drop-down menu "Shared Connection" select the connection through which the computer connects to the Internet;
- In the bottom drop-down menu, select the desired connection type.
How to choose the right type of connection?
In order to correctly create a wifi network, you need to select the desired type of connection - this is important! There are two modes: access point or ad hoc.- ad hoc. This mode provides a point-to-point connection. In simple terms, only one device can be connected to a virtual router.
- access point. This mode will allow you to connect to the "access point" (distributing wi-fi device) a large number of receiving devices. Possible problems and their elimination
Without Wi-Fi technology, the life of most modern people is unthinkable. First of all, it is very convenient: you can use the Internet both at home and at the train station or airport, in various institutions and enterprises. Therefore, it is extremely important to understand how this technology works and be able to use it correctly.
What is a virtual router?
A device that forwards information packets between segments (computers) within a network. It is routers that allow us to use wireless Internet: computers or other devices that we connect to any network, the router unites into one network, allowing them to simultaneously use the Internet.
A virtual router is a technology that allows, on the basis of a single network card, to create a virtual device that performs all the same functions as a real one. At the same time, the device itself does not physically exist: we can say that our computer becomes a router. No need to fiddle with wires and setup.
Any computer with Windows 7 installed provides this capability.
In this case, two methods are possible:
- Use the technology implemented at the kernel level and configure the connection via the command line;
- Use additional software that takes on the task of setting up and provides a convenient interface;
Having dealt with why we need this, we will consider both options in detail.
What are virtual routers for?
Surely you have repeatedly had to distribute Wi-Fi from your phone? For phones with the iOS operating system, it is enough to turn on the "tethering mode" in the settings, enter the network name and password - you're done! Your phone at this point becomes a full-fledged Wi-Fi hotspot. Each time you use this feature on your phone, you actually create a virtual router, connecting users connected to you into a single network. The only difference is that on Windows this is a little more difficult.
So, the main reasons for using:
- The need to “share” Wi-Fi to another person as quickly as possible;
- Saving money by not having to purchase a router;
- Lack of an electrical outlet nearby to connect the router;
Installation and setup
Method 1. We use the technology built into Windows 7.
We need a command line. To call it, press the key combination Win + R:
Launching "Run" with Win+R
Enter in the window that opens "cmd", click OK
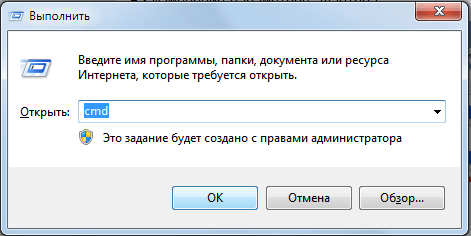
Run window in Windows 7
A command line window will open. Type the netsh command and press Enter.
Then we write the following line:
wlan set hostednetwork mode=allow ssid="name" key="password" keyUsage=persistent
Here name is the name of the future network, password is the password, respectively. Keep in mind that the password must not only consist of numbers or letters.
Press Enter, if everything went well, we see the following:

Don't close the command line! We will still need it.
The network adapter (virtual Wi-Fi) has been created, however, let's check. Go to the Control Panel, go to the Network and Sharing Center, and then go to the "Change adapter settings" section
Among the list of networks we should see the following:

As you can see, our connection is created, but does not work. Open a command line window and write:
wlan start hostednetwork
Then we see a notification that everything is running:
![]()
Go to "Network and Sharing Center". Now our point is working:

Ready! At this stage, the creation of a virtual Wi-Fi router is completed.
Method 2. Using specialized programs.
To set up a virtual Wi-Fi point without resorting to the command line and to be able to manage our network, you can use special programs.
What is the main difference between this method and the first one? It's about functionality. Let's say you wanted to change your network name or password without running to the command line and wasting no time typing some commands there. Or, for example, you want to monitor which computers connect to you and, if you wish, block them. These opportunities are provided by software such as Connectify.
You can download this program from the official site, as well as from any other source. Installation is also as simple as possible and will not cause any problems.
There are only a few obvious fields in the main window of the program: Name, Password and Internet to Share. We set the last parameter to automatic, since the program itself will select the desired connection for distribution.

Click the Start Hotspot button and you're done! In the Clients tab, we see a list of devices connected to us, which we can easily block:

Results
We got acquainted with what virtual routers are and what they are used for, considered the main ways to organize them on your computer. Which way to use is up to you. In any case, the technology of creating virtual routers is a skill that is extremely useful for any user. In addition, taking up this topic more seriously, you can learn for yourself a lot of all sorts of interesting things.
Hello admin, I have a laptop at home and local Internet is connected to it"Beeline" , also the children have another laptop, a tablet and a smartphone, the question is, can I use some program to distribute Wi-Fi Internet from a laptop, that is, use the laptop as a router, which, as you understand, I don’t have?
In the global network there is a description of working with the Virtual Router Plus program, I do everything as it is written there, but the laptop does not distribute Wi-Fi, either I didn’t understand something or something important was missed in the article.
How to distribute Wi-Fi Internet from a laptop or how to use Virtual Router Plus and Connectify Hotspot 2015
Hello friends! Even in the absence of a router, it is possible to create a virtual Wi-Fi network using an ordinary laptop, because we live, after all, in the wireless era.
Creating a Wi-Fi network on a laptop is very simple using a special program. There are two very good free utilities that can help us in this matter: Virtual Router Plus and Connectify Hotspot 2015, but if don't know one thing, then you will not succeed, I will definitely tell you about it.
First of all, let's connect our laptop to the Internet using a cable. I also do not have a router and I connect my laptop to the Internet using the Beeline provider.
Network connections must have both network adapters enabled: ethernet adapter and adapter wireless network.

Now let's get to our programs.
Virtual Router Plus
A cool program that works without installation, you can download it on my Yandex.Disk.


We extract the folder with the program from the archive and run the executable file VirtualRouterPlus.exe.

Set up the program, fill in all the fields.
Network Name (SSID)- come up with a name for your wireless network, for example, I'll call renontcompa.ru.
Password- the password for the wireless network must be at least 8 characters and in English, but come up with such a password so as not to forget.
Shared connection- select in the list the name of the connection that supplies the Internet locally to the laptop, in my case Beeline (Beeline Internet), since I do not have a router. In your case, if the laptop is connected with a LAN cable to the router, it may just be Ethernet (Local Area Network Connection).

That's all the settings, click on the button Start Virtual Router Plus.

Virtual Router Plus is up and running,

but there is one more setting left. Let's go to the folder Network and Sharing Center.

Change adapter settings

Folder opens Network connections. O pay attention, appeared LAN connection 15(in your case it may be called differently) it is created by the program itself Virtual Router Plus.

Here friends, most importantly, do not miss anything!
1. Pay attention, in my Network Connections folder, there is an icon Beeline Internet, this means that I do not have a router and the Internet cable (WAN) of the Beeline provider from the corridor is directly connected to the laptop. In your case, there may be another provider's icon.
2. But if you have a router, then there will be no provider icon, but just an icon LAN connection or ethernet.
In short, if you have a router, right-click on the icon"Local Area Connection" or "Ethernet" and select Properties.

If you do not have a router, right-click on the icon of your provider (in my case) "Beeline Internet" and also choose Properties

Let's go to the tab Access. Home network connection: click on the arrow and select Local Area Connection* 15(in your case, the name may be different).

Check the boxAllow other network users to use this computer's Internet connection and click OK.


Now our laptop is distributing the Internet and to connect to it (like a router), you just need to left-click on the Network icon on another laptop

We select our wireless network (for example, I called renontcompa.ru) and click Connect

Connected.

Open the browser and we are on the Internet

So, from a laptop, we distributed Wi-Fi Internet and connected another laptop to the resulting wireless network.
For example, let's connect another tablet to our virtual network
Settings

WLANs

Choosing our network site

Enter the password and click Connect

Connected

Open a browser and go online

I want to say that with a router, of course, everything will be cooler and faster, but in some cases the ability to use this program may come in handy.


