Styling for corners and borders in CSS. Border-radius property. Rounding borders in CSS Rounding corners with border-radius
Vlad Merzhevich
With CSS, you can add a border to an element in several ways. Basically, of course, the border property is used, as the most universal, as well as outline and, surprisingly, box-shadow, the main task of which is to create a shadow. Next, we will consider these methods and their differences among themselves.
Outline property
The simplest property for creating frames. Has the same parameters as border, but differs significantly from it in some details:
- outline is drawn around the element (border is inside);
- outline does not affect the dimensions of the element (border is added to the width and height of the element);
- outline can only be set around the entire element, but not on individual sides (border can be used for any side or all at once);
- the outline is not affected by the rounding radius set by the border-radius property (border is affected).
The question arises - in what cases is an outline needed, when its role, despite the listed differences, is fully assumed by the border? There are not so many situations, but they do occur:
- creation of complex multi-colored frames;
- adding a border to an element when you hover over it with the mouse cursor;
- hiding the frame added by the browser automatically for some elements when they receive focus;
- for an outline, you can set the distance from the edge of an element to the frame using the outline-offset property to create.
Multicolored frames
It should be understood that outline in no way replaces border and may well exist with it, as shown in example 1.
Example 1. Creating a frame
In this example, a black border is added around the element, which is separated from the background by a white border (Fig. 1).
Rice. 1. Frame around the element
Frame when using: hover
Adding a border through border increases the width of the element, which is quite noticeable when combining border and the: hover pseudo-class. There are two ways how to "win" this. The simplest thing is to replace border with outline, which we know has no effect on the dimensions of the element (example 2).
Example 2. Frame on hover
outline is not always suitable, if only because the rounding of the corners does not affect it. Here the second method is suitable - add an invisible frame or frame that matches the background color, and then change its parameters on hover (example 3). Then no displacement of the element will occur, since the frame already exists from the beginning. But always remember that the width of an element is the sum of the values of width, border on the left, and border on the right. The situation is similar with height.
Example 3. Frame on hover
Border around form fields
In some browsers (Chrome, Safari, recent versions of Opera), a small colored border appears around form fields when they receive focus (Figure 2). To remove it, just add the none value to the outline property in the styles, as shown in example 4.
Rice. 2. Frame around the fields
Example 4. Removing the frame
Frames via box-shadow
Although the box-shadow property is intended to add a shadow around an element, it can also be used to create borders that cannot be done with a border or outline. This is due to the fact that the number of shadows can be unlimited, the parameters of which are listed separated by commas.
To get the frame, the first three parameters should be set to zero, they are responsible for the position of the shadow and its blur. The fourth parameter in this case is responsible for the border thickness, and the fifth sets the border color. For the second frame, the fourth parameter is equal to the sum of the thicknesses of the two frames.
Example 4 shows how to add two borders and one border to the right using one box-shadow property.
Example 4. Using box-shadow
The result of this example is shown in Fig. 3.

Rice. 3. Frames created by the box-shadow property
In this tutorial, we will create the curved corners effect without using images or additional markup. It works great in all modern browsers and works well for website designs with simple color schemes.
This effect was used in the demo for the "Multiple backgrounds and strokes using CSS2" tutorial. In addition, the use of curled corners in the design of a real site can be seen on the example of Yiibu. But the Yiibu site uses images, and we use pseudo-elements and CSS.


Start
Nothing complicated. Any element will do and no additional markup is required. It all starts with a simple colored rectangle. Browsers that don't support pseudo-elements (IE6 and IE7) will render it too.
The addition of the position: relative property makes absolute positioning of pseudo-elements possible.
Note (position: relative; width: 30%; padding: 1em 1.5em; margin: 2em auto; color: #fff; background: # 97C02F;)
The folded corner is created using a pseudo-element that is positioned at the top corner of the rectangle. The pseudo-element has no width or height, but it has a thick stroke. By changing the thickness of the stroke, we will change the size of the folded corner.
In this example, the top and right portions of the stroke have colors that match the background color of the parent rectangle. The left and bottom portions of the stroke are darker or lighter than the background color of the rectangle.
Note: before (content: ""; position: absolute; top: 0; right: 0; border-width: 0 16px 16px 0; border-style: solid; border-color: # 658E15 #fff;)
That's all it takes to create a simple curved corner effect similar to the one used on the Yiibu website.
Firefox 3.0 does not allow positioning of pseudo-elements. You can use a couple of properties to fix things in a given browser.
Note: before (... display: block; width: 0;)
Add a subtle shadow
The appearance of the corner can be slightly improved by adding a box-shadow property (for those browsers that support it) to the pseudo-element. Setting the overflow: hidden property on an element class hides the portion of the shadow that breaks the curled corner effect.
Note: before (... -webkit-box-shadow: 0 1px 1px rgba (0,0,0,0.3), -1px 1px 1px rgba (0,0,0,0.2); -moz-box-shadow: 0 1px 1px rgba (0,0,0,0.3), -1px 1px 1px rgba (0,0,0,0.2); box-shadow: 0 1px 1px rgba (0,0,0,0.3), -1px 1px 1px rgba (0,0,0,0.2);)
Rounded corners
It is also relatively easy to use this technique in conjunction with the rounded corners. Unfortunately, every modern browser has some sort of bug related to the border-radius property (including those using the unprefixed property). This situation means the need for additional work.
Only Webkit browsers can make rounded corners for pseudo-elements if they have only 2 parts of the stroke. Opera 11 and Firefox 3.6 create an eye-catching heap. Moreover, Opera 11 has the maximum error in this process.
Using all four sides eliminates problems in Opera 11 and Firefox 3.6. But this method of solution leads to an error in Safari 5, which is expressed in the output of a diagonal line with teeth. You can work around this problem by setting the color of at least one part of the stroke to transparent.
The background color will be visible through the transparent stroke. Ideally, this approach will generate effect and contain a minimum of code. But Opera 11 only shows the background color through a transparent stroke if the border-radius property is set.
Note-rounded: before (content: ""; position: absolute; top: 0; right: 0; border-width: 8px; border-color: #fff #fff transparent transparent; background: # 658E15; -webkit-border- bottom-left-radius: 5px; -moz-border-radius: 0 0 0 5px; border-radius: 0 0 0 5px; display: block; width: 0;)
The CSS file for the demo page contains comments useful for working. Every browser is different when using the border-radius property or bordering elements with no width or height.
The final look of the code
Below is all the CSS needed to create a curled corners effect with light drop shadows and using just one HTML element.
Position: relative; width: 30%; padding: 1em 1.5em; margin: 2em auto; color: #fff; background: # 97C02F; overflow: hidden; ) .note: before (content: ""; position: absolute; top: 0; right: 0; border-width: 0 16px 16px 0; border-style: solid; border-color: #fff #fff # 658E15 # 658E15 ; background: # 658E15; -webkit-box-shadow: 0 1px 1px rgba (0,0,0,0.3), -1px 1px 1px rgba (0,0,0,0.2); -moz-box-shadow: 0 1px 1px rgba (0,0,0,0.3), -1px 1px 1px rgba (0,0,0,0.2); box-shadow: 0 1px 1px rgba (0,0,0,0.3), -1px 1px 1px rgba (0,0,0,0.2); display: block; width: 0; / * Overcome Firefox 3.0 limits * /) .note.rounded (-webkit-border-radius: 5px; -moz-border-radius: 5px ; border-radius: 5px;) .note.rounded: before (border-width: 8px; border-color: #fff #fff transparent transparent; -webkit-border-bottom-left-radius: 5px; -moz-border- radius: 0 0 0 5px; border-radius: 0 0 0 5px;)
Conclusion
The demo page contains examples using different colors to make sure the effect is easy to use.
It should be borne in mind that this technique works worse when using an image as the background for an element than when using a simple color. But other methods of organizing bent corners also have such restrictions.
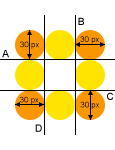
, , - CSS properties - (Transparent) - CSS property. Responsible for creating a diagonal frame
- "px" - value in pixels
In this article we will talk with you about creating frames, but not regular square ones, but rounded ones. They have a more beautiful appearance than ordinary square frames without rounding.
Property
In this article, we'll take a closer look at creating round frames and more. There is such a thing as triangular borders in CSS, but more on that below.
Rounding frames with
 html (margin: 0; padding: 15vh 0 0 0;) #content (border: 5px solid red; height: 70vh; width: 80%; border-radius: 15px; margin: 0 auto)
 This CSS property allows you to round the borders of an element. Some developers use it without creating visible borders to create layouts on a rounded "body" container.
You can use standard radii to create rounded shapes, such as a circle or an oval.
In order to track the operation of this property, it is enough to set the property
The property itself
Simple property
Rounding can be applied to all HTML elements, but not in all cases. Some browsers do not accept it when loading frames that have the property
Different values can be used to determine the radius of the rounding, but most often the value is specified in pixels. This is because they are best suited for detailing small sized items.
In addition to the usual rounding, you can use an additional radius, for example, to create an ellipse.
To do this, you need to divide the values with a fraction.
Property - examples:


We will now show a couple of examples of creating a rounded border. To study them in more detail download our sources.
Creating triangles with

To create triangles, use the property
First, set the width and height to zero for the triangle element.
After that, write down a few properties. The first is the main thing, the property of the frame. It is created in almost the same way as usual. Set the width, line type and enter the value "transparent". It is responsible for creating a triangle.

In order to create an even side of the triangle, you need to create a separate frame line for this side.
Conclusion
Now you know everything about the property
It may seem very difficult at first, but if you practice it is easier than you think. Download our sources and study their code for a better understanding of how the property works. Good luck with your learning!
Tags:CSS3 frame augments the formatting capabilities of element borders with properties that allow round corners element and also use Images to decorate the borders of an element.
Rounded corners and picture frames
1. Rounding corners with border-radius
Browser support
IE: 9.0
Firefox: 4.0
Chrome: 4.0
Safari: 5.0, 3.1 -webkit-
Opera: 10.5
iOS Safari: 7.1
Opera Mini: —
Android Browser: 4.1
Chrome for Android: 44

The property allows you to round the corners of inline and block elements. The curve for each corner is defined with one or two radii defining its shape - circle or ellipse... The radius extends to the entire background, even if the element has no borders, the exact position of the secant is determined using the background-clip property.
The border-radius property allows you to round all corners at the same time, and using the border-top-left-radius, border-top-right-radius, border-bottom-right-radius, border-bottom-left-radius properties you can round each corner separately ...
If you set two values for the border-radius property, then the first value will be rounded top left and lower right corner and the second is top right and bottom left.
Values given through / determine horizontal and vertical radii... The property is not inherited.
Variants
Div (width: 100px; height: 100px; border: 5px solid;) .r1 (border-radius: 0 0 20px 20px;) .r2 (border-radius: 0 10px 20px;) .r3 (border-radius: 10px 20px ;) .r4 (border-radius: 10px / 20px;) .r5 (border-radius: 5px 10px 15px 30px / 30px 15px 10px 5px;) .r6 (border-radius: 10px 20px 30px 40px / 30px;) .r7 ( border-radius: 50%;) .r8 (border-top: none; border-bottom: none; border-radius: 30px / 90px;) .r9 (border-bottom-left-radius: 100px;) .r10 (border -radius: 0 100%;) .r11 (border-radius: 0 50% 50% 50%;) .r12 (border-top-left-radius: 100% 20px; border-bottom-right-radius: 100% 20px ;)
Rice. 1. Examples of different options for rounding the corners of the block
2. Border-image
Browser support
IE: 11.0
Firefox: 15.0, 3.5 -moz-
Chrome: 16.0, 7.0 -webkit-
Safari: 6.0, 3.0 -webkit-
Opera: 15.0, 11.0 -o-
iOS Safari: 7.1
Opera Mini: 8 -o-
Android Browser: 4.4, 4.1 -webkit-
Chrome for Android: 42
The property allows you to set the image as the border of the element. The main requirement for the image is that it must be symmetrical. The property includes the following values: (border-image: width source slice repeat outset;).
Using such a simple image, you can get such a frame for an element.
/ * Example 1 * / div (width: 260px; height: 100px; border-style: solid; border-image-width: 15px; border-image-source: url (border_round.png); border-image-slice: 30 ; border-image-repeat: stretch;) / * Example 2 * / div (width: 260px; height: 100px; border-style: solid; border-image-width: 15px; border-image-source: url (border_round. png); border-image-slice: 30; border-image-repeat: round;) 


 Rice. 2. An example of block border decoration using an image
Slices A - B - C - D form the corners of the border, and the part of the picture between them fills the remaining space of the border according to the specified value of the border-image-repeat property. The size of the corner (in this example, the number 30) is set using the value of the border-image-slice property.
2.1. Border-image-width
The property sets the width of the image for the border of the element. If no width is specified, it defaults to 1.
| border-image-width | |
|---|---|
| Values: | |
| length | Sets the width of the border in units of length - px / em. You can set from one to four values at the same time. If one value is given, then the width of all sides of the frame is the same, two values set the width of the top-bottom and right-left, etc. |
| number | The numeric value by which the border-width value is multiplied. |
| % | The width of the element's border is calculated relative to the size of the image. Horizontal relative to width, vertical - relative to height. |
| auto | Corresponds to the value of border-image-slice. |
| initial | |
| inherit | |
Syntax
Div (border-image-width: 30px;) Fig. 3. An example of setting the width of the image frame using different types of values
2.2. Border-image-source resource
The property sets the path to the image that will be used to decorate the borders of the block.
Syntax
Div (border-image-source: url (border.png);)
2.3. Border-image-slice elements
The property determines the size of the parts of the image used to decorate the borders of the element and divides the image into nine parts: four corners, four edges between the corners and the center part.
| Values: | |
| number | The size of the frame parts can be set using one, two, three or four values. One value sets the borders to the same size for each side of the element. Two values: the first determines the size of the upper and lower borders, the second - the right and left. Three values: the first determines the size of the upper border, the second - the right and left, and the third - the lower border. Four values: Determines the size of the top, right, bottom, and left border. The numeric value represents the number of px. |
| % | Border sizes are calculated relative to the size of the image. Horizontal relative to width, vertical - relative to height. |
| fill | The value is indicated along with a number or percentage. If specified, the image is not cropped with the inner edge of the frame, but also fills the area inside the frame. |
| initial | Sets this property to its default value. |
| inherit | Inherits the value of this property from the parent element. |
Syntax
Div (border-image-slice: 50 20;)  Rice. 4. An example of setting slices of an image frame
2.4. Border-image-repeat
The property controls the filling of the space between the corners of the frame by the background image. It can be set using a single value or using a pair of values.
Syntax
Div (border-image-repeat: repeat;) Fig. 5. An example of repetition of the central part of the image frame using different types of values
2.5. Offset border-image-outset
The property allows you to move the frame image outside the bounds of the element by the specified length. Can be set using either one or four values.
Syntax
Div (border-image-outset: 10px;)  Rice. 6. An example of displacement of an image frame using different types of values
3. Gradient frame
The border-image value can be not only an image, but also a gradient fill.
Translucent frame
Transparent is one of the colors. In this way, you can set borders for all sides of an element at once or separately for each side. The width of the border is controlled by the border-width property.
Postal envelope


