android contacts sync with google
How to sync Android contacts with Google account? It is not so difficult to answer this question, but at first it is worth understanding whether it is worth doing it at all? In fact, synchronization is an important functional element of a smartphone and allows you to save data in cloud storage with the possibility of later recovery. Few people use this feature and then regret the lost data. Therefore, if you are still not using it, we advise you to immediately change the situation. Next, we will analyze how to sync contacts from Google to Android, and also note how to enable synchronization.
Checking for registration
Before you use the contacts synchronization feature, you need to check if you have a Google account. This element is your calling card in the phone and includes all the necessary information about your profile, downloaded data and actually activates all the possible functions of smartphone applications.
To check if there is an enabled account on android, you need to:
- go to the "Settings" item;
- then go to the "Accounts" tab;
- check if there are marks there regarding the existence of an account.
If you have one, then you will see a characteristic mark with the name "Google". If there are no accounts, then you need to register, which may take a couple of minutes, and we will analyze how to do this further.
"Settings" -> "Accounts"
Signing up for a Google account
The phone is quite a convenient device in many ways, but not in the case of registration, so it is better to go through it on a computer, and then use the entered data to enter. So, go to the official Google website, on the top right click on the "Login" button, then click on "Add account". After that, a window will open for entering the necessary information, enter the data there, write them down on a piece of paper (so you don't forget), confirm the created account and only after the done actions return to the phone.
 Registering a Google Account
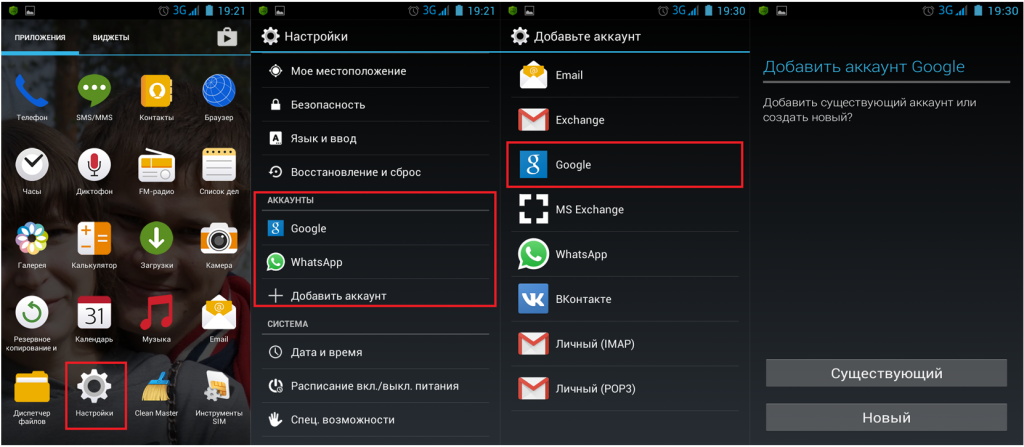
 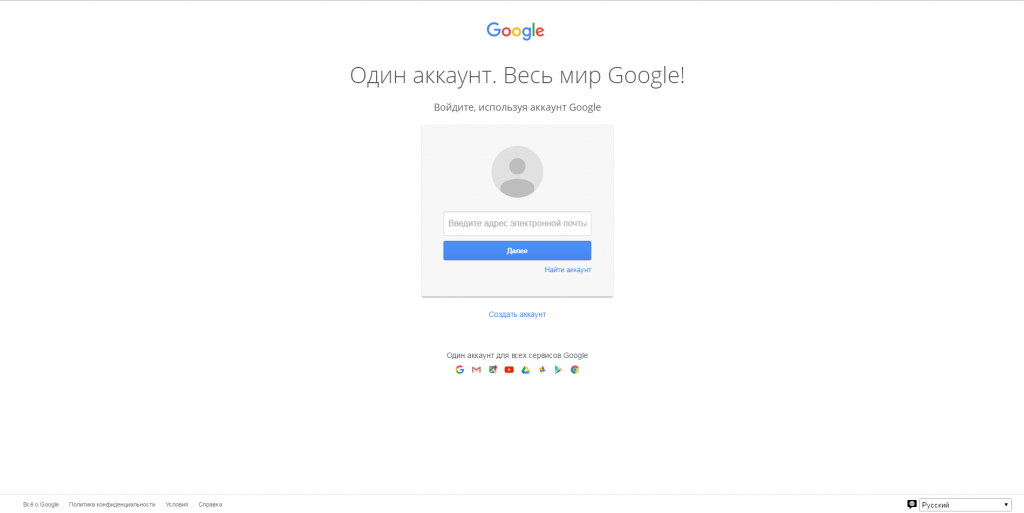 Use the menu item "Add account"
 Then we do the following:
- go to the "Settings" item;
- select the sub-item "Accounts";
- enter the "Add account" menu;
- select Google as the main account;
- click on the item "Existing";
- enter the data that was used during account registration.
 Use your phone to access your account
 After the done actions, you will have a synchronized account, which includes all the necessary functions and possibilities for using the phone. Now you have an Android phone with Google and all that remains is to activate the synchronization.
We synchronize contacts
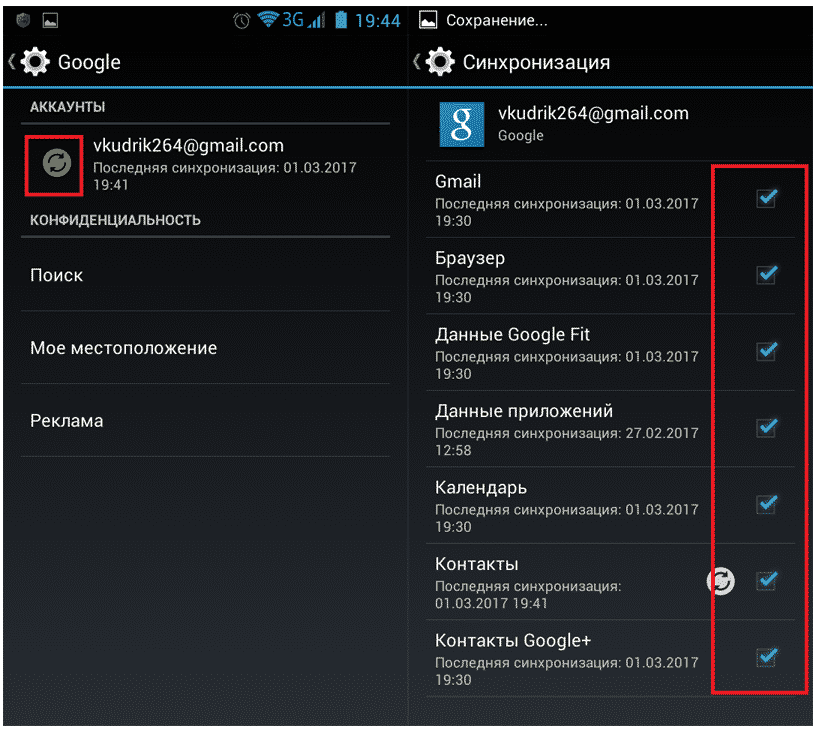
If you think that synchronization is some complicated process, then you should not burden yourself so much, in fact it is simple and straightforward. You just go to the "Settings" item, then scroll down to the "Accounts" item and select your Google account. As soon as you enter it, pay attention to the first footnote, if it has an icon with two arrows and it is green, then you have synchronization turned on and there is nothing to worry about, since it automatically carries out all the necessary processes.
If this icon is greyed out, sync is disabled. Therefore, just click on this item and go to the account settings menu. There are checkboxes in front of certain data. Checking the entire list we recommend that you check all the boxes. Below each item is the date when the last synchronization was carried out. If it does not suit you, then you first uncheck the item, and then put it again. Thus, synchronization will take place automatically and a fresh date will be set.
The synchronization method made is 1 among all available and it is the easiest. If you use it constantly and simply adjust the synchronization, then you will not have problems when buying a new phone, since your Google account will be your main element. You activate it, go through synchronization and all your accounts will be automatically added to the phone book.
 Sync phone and cloud storage


