How to install custom recovery on android
By default, all Android devices have a recovery mode called Recovery. With it, you can roll back the operating system to standard settings, install official add-ons and fixes. If this is not enough for you and you want to install third-party firmware, kernels and utilities on your device, then you need to replace the factory recovery with a custom one.
Custom recovery: what to choose
The most popular custom recovery for Android are Clockworkmod Recovery (CMD) and TeamWin Recovery (TWRP). The main difference between one program and another is the presence of touch control in the latter. As for the functionality, the software offers approximately the same list of options:
- Installation of unofficial patches, firmware;
- Connecting the device to a PC in ADB mode and instead of a removable drive;
- Formatting, creating, merging partitions in the internal memory of the device;
- Clearing the software cache and battery summary;
- Creation of backup copies of the system.
After studying the methods below, you can easily install custom recovery on Android. You need to get Root-rights before carrying out work.
Ways to install TWRP
You can install TWRP recovery using a special software developer utility (TWRP Manager), third-party software designed for flashing recovery, and Android Debug Bridge (ADB).
Installing TWRP using TWRP Manager
Your first step is to download TWRP Manager from the Play Store and install the application on your device. The utility must be opened to give rights to Root access. Then:
- in the menu that appears on the left, select "install twrp";
- a window will appear in front of you where you need to select the device and the version of the recovery that you want to install;
- after selecting all the settings, click “install recovery”;
- the program will automatically download the recovery and install it;
- if you want to install a specific version of recovery that you downloaded in advance, then you need to save recovery.img and select it through the "select img file" item.
ADB as a way to flash recovery
Such a solution with reinstalling the recovery is suitable for advanced PC users. To carry out the manipulations, you will need an Android device, a computer and a USB adapter. First you will need to install the Android SDK with all packages along with the Google USB Driver. After that:
- save the Recovery.img version of TWRP supported by your smartphone to your computer;
- rename the recovery file to twrp.img, save it to the root memory of your device.
Connect your device to your computer using USB. Launch the PC operating system command line (cmd in Windows). Write the following lines in it:
- cd C:\android-sdk-windows\platform-tools\adb;
- su
dd if=/sdcard/twrp.img of=/dev/block/mmcblk0p34.
After that, reboot your device.
Ways to install CMD
You can install CMD using Rom Manager, FastBoot mode, or third-party utilities for flashing recovery.
Installing CMD using Rom Manager
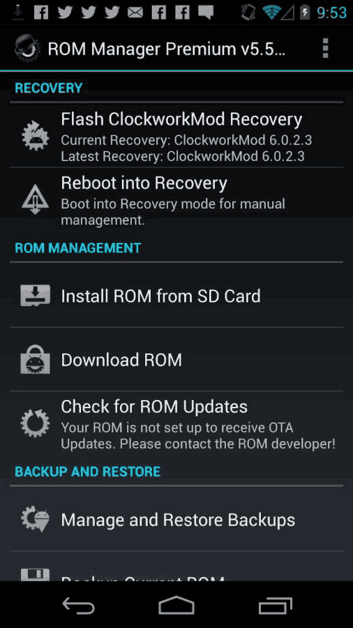
- Download Rom Manager from the Play Store and install it on your device. Don't forget to give it Root access.
- After starting the program, a window will appear, including several sub-items. You will need to go to the "Recovery Setup" tab.
- A new window will appear. There select CMD. After that, you will need to select the model of the device on which the recovery will be installed.
- After that, another window will appear where you must confirm your actions.
Rom Manager will download the files to install the recovery, ask for Root rights if you did not provide them by default. After that, she will proceed to install the software. Once everything is finished, you can check the installation of CMD by going from the main menu to the "Reboot into Recovery" tab.
CMD installations in FastBoot mode
To reflash an Android device in this way, you will again need to download the Android SDK, a USB driver for your smartphone / tablet. Save the recovery file from the CMD site, rename it to update.img, save it to the platform-tools folder located in the directory of the installed Android SDK. Then enable USB debugging on your Android device.
Launch Command Prompt and enter the following commands:
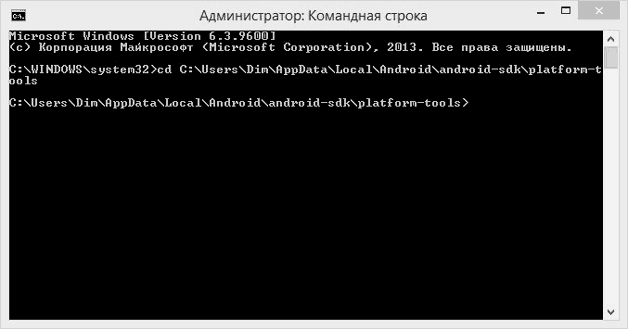
If everything goes well, a corresponding notification will appear on the command line.
Installing CMD and TWRP via Flashify
As we mentioned earlier, they install custom recovery for Android with third-party utilities. One of them is Flashify. A distinctive feature of the program is compatibility with many models of smartphones and tablets. You need to install the software on the device and allow it to use Root rights. 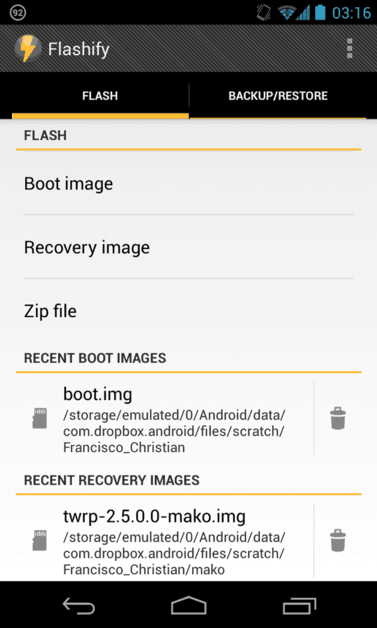
- On the main screen of the running application, select "Recovery Image".
- You will see a window with a choice of recovery version and a choice of device model (if you have not downloaded the program in advance).
- After the desired version of the recovery is saved to the device's memory, click on "YUP!".
- Flashify will install the program, automatically reboot the device.


