How to remove root rights on android using a computer and applications
Getting root (administrator access) is the first goal of any user who wants to get the most out of their tablet or smartphone. Delete or change system files, repartition the built-in memory, create backup copies of programs and restore them, as well as many other actions are unthinkable without root.
However, in some cases, it is also necessary to refuse Root access. Consider why and how this is done.
Why Remove Root Rights
Why voluntarily cut back on your smartphone use? There are a number of good reasons sufficient to remove the root:
- You intend to take advantage of the warranty repair, and rooting (by the way) will void the warranty. This does not apply to all manufacturers: for some it is enough that the hardware remains intact. But often in service centers it is necessary to prove that you have not modified the software. Therefore, to repair it is necessary to remove the root.
- You're about to receive an update over the air, but it won't install on rooted devices. Perhaps the most common reason for removing root.
- You want to reduce the risk of your smartphone or tablet getting infected with malicious apps or modifications. On a rooted device, malware can cause much more trouble.
- You are giving away your device to a non-advanced user (for example, a child or an older relative) and want to eliminate the risk of problems with the OS.[/su_list]
Any of these reasons will make you think about returning your device to its original form (with the exception of some devices from the Middle Kingdom, which come with an already received root).
How to remove root rights
There are several ways of varying degrees of radicalness that allow you to abandon the already unnecessary root access. Let's try to deal with each of them:
[su_list icon="icon: android" icon_color="#006905"]
- Flashing via computer. By deleting the old firmware, you will clear all rights, the updated smartphone or tablet will be deprived of root access. This is the most destructive method: data not transferred to an SD card or external media will be lost. Sometimes, however, this is even beneficial (for example, if you want to return, sell or donate your device, there is absolutely no need to give personal data along with it). After flashing, it is recommended to immediately reset to factory settings.
- If you have the SuperUser app installed, you can use it to remove root access directly from a running Android (as shown in the animated image below).[/su_list]
[su_list icon="icon: android" icon_color="#006905"]
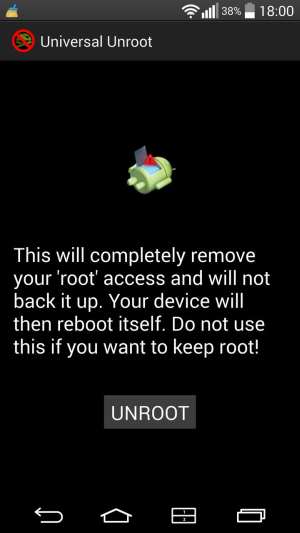
- The Universal Unroot application will help you automate the process of getting rid of unnecessary rights. Just install and run it. The application is compatible with devices on all modern versions - from ancient Android2 to the latest 6.0.[/su_list]
[su_list icon="icon: android" icon_color="#006905"]
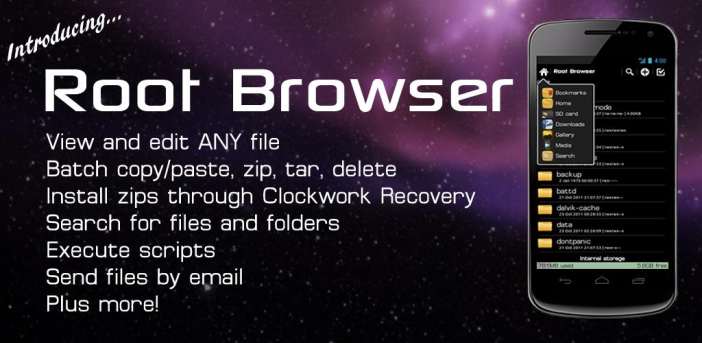
- Manual root removal. Root Browser Lite (https://play.google.com/store/apps/details?id=com.jrummy.root.browserfree) works well for this. With this application you need to delete the following files:[/su_list]
/system/bin/su or /system/bin/busybox (if available)
/system/xbin/su or /system/xbin/busybox (if available)
Folder /system/xbin/su
Reboot your device after uninstalling. If you wish, you can also delete the Root Browser Lite application, it has done its job. It is also advisable to reset the settings through the recovery menu (reboot and select the Wipe Data / Factory Reset item) and format the memory card, subsequently returning all valuable data to it.
Now your smartphone or tablet no longer has traces of the transferred interference, as if there was no root on it. You can safely give it or sell it, carry it to a service center or trust him with confidential information.


